Why You’d Want to Route Audio from Your DAW
Music software like GarageBand, Logic Pro, FL Studio, or Ableton Live usually plays sound directly through your headphones or speakers. But what if you want to send that same audio into another app? Maybe you're streaming, recording a tutorial, or using it for collaborative music creation.
By routing your DAW’s output through a virtual audio device, you can:
- Stream your beats or live sets into apps like Zoom, OBS, Sounts or Twitch
- Send high-quality sound directly into other tools without re-recording
- Capture clean audio for videos, podcasts, or lessons
- Combine multiple apps into one seamless studio setup
In short, it lets you treat your DAW like an audio source that other apps can hear.
The Problem: DAWs Don’t Share Audio by Default
Most DAWs are designed for creating and editing music. They output sound to your headphones or speakers, but they don’t share that audio with the rest of your system. Other apps only recognize your built-in microphone or external audio input.
That’s where virtual audio drivers come in. They work like invisible cables inside your computer, carrying audio from one program to another without any extra hardware.
What You’ll Need
To route your DAW audio into other apps, you’ll need:
- A DAW like GarageBand, Cubase, Logic Pro, or Ableton Live
- A virtual audio driver like BlackHole (macOS) or VoiceMeeter (Windows)
- (macOS only) Audio MIDI Setup to create a multi-output device so you can hear your audio while routing it elsewhere (already built into macOS)
These tools let you treat your DAW like a virtual audio source. The virtual audio driver acts like an invisible cable that carries sound between programs. On Mac, Audio MIDI Setup helps you combine this with your regular speakers or headphones so you can still monitor what you're doing.
Step-by-Step Guide: Setting Up Audio Routing
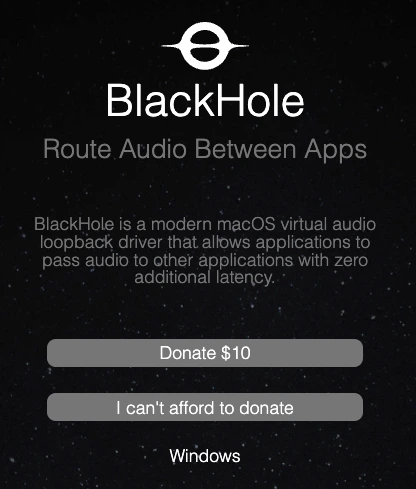
First, you’ll need to download BlackHole, a free and open-source virtual audio driver for macOS.
Head to existential.audio/blackhole and choose how you want to get the installer. You have two options:
-
Donate $10 to support the developer and get the
download instantly
(It’s always nice to support people for the tools they create) - Or click “I can’t afford to donate” to receive the installer via email for free
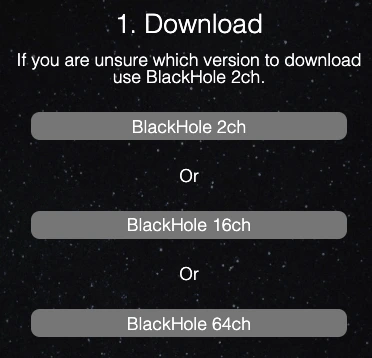
- BlackHole 2ch is the simplest and easiest to set up. Perfect if you're just routing audio from your DAW into one other app.
- BlackHole 16ch or 64ch give you more flexibility for complex setups (like routing multiple sources separately), but they can be harder to manage.
For Sounts, 2ch is the best choice. It's simple, stable, and does exactly what you need.
Now just open the installer that you just downloaded and follow the installation steps. You might need to restart your Mac to finish the installation.
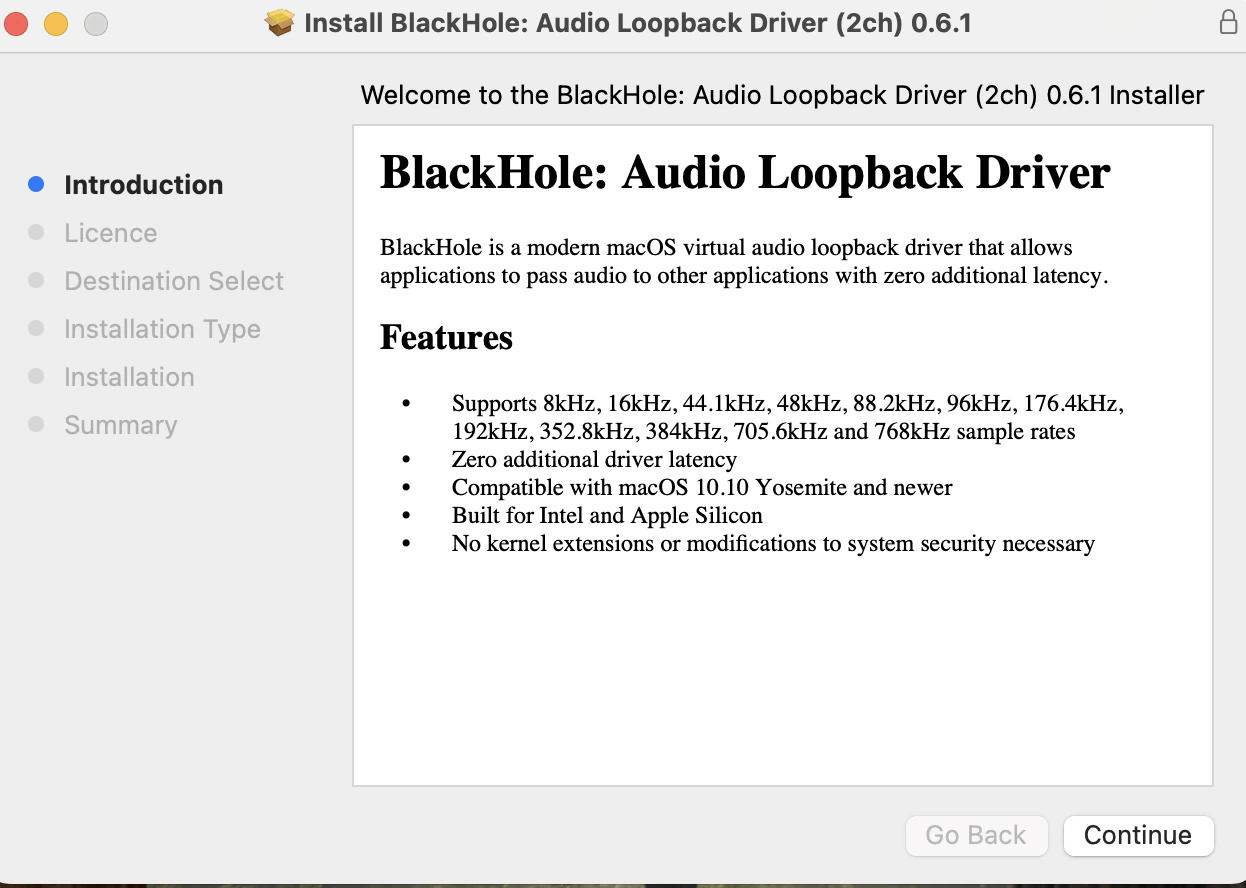
Once BlackHole is installed, you’ll see it as an audio device in your system settings and DAW.
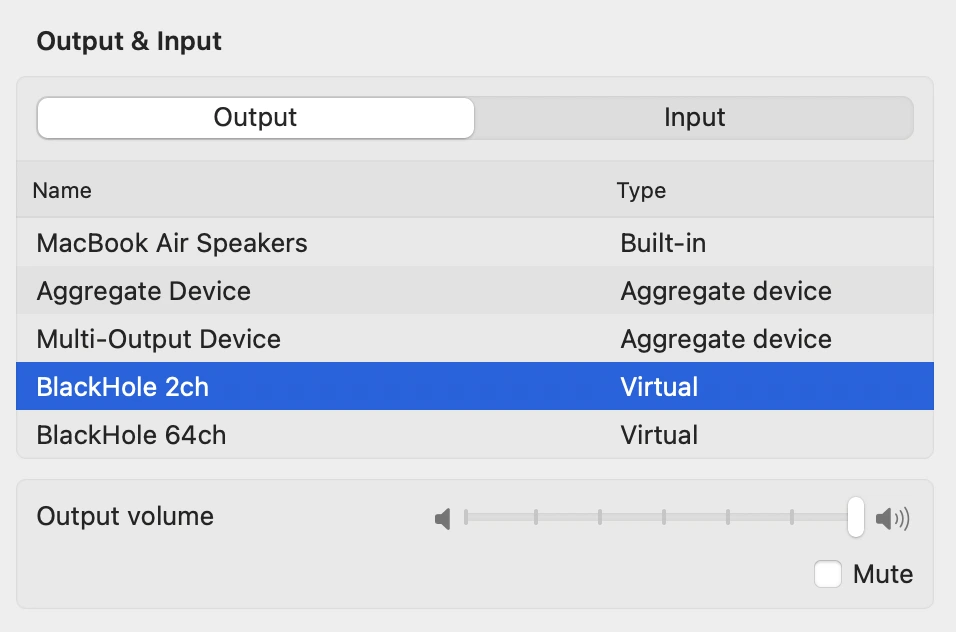
By default, when you set your DAW’s output to BlackHole, you won’t hear anything, because the audio is only routed into the virtual device. To hear your sound and send it to another app, you need to combine BlackHole with your regular output (like headphones or speakers) using a multi-output device.
Here’s how:
-
Open Audio MIDI Setup
Press ⌘ + Space and search for Audio MIDI Setup (it’s built into macOS). -
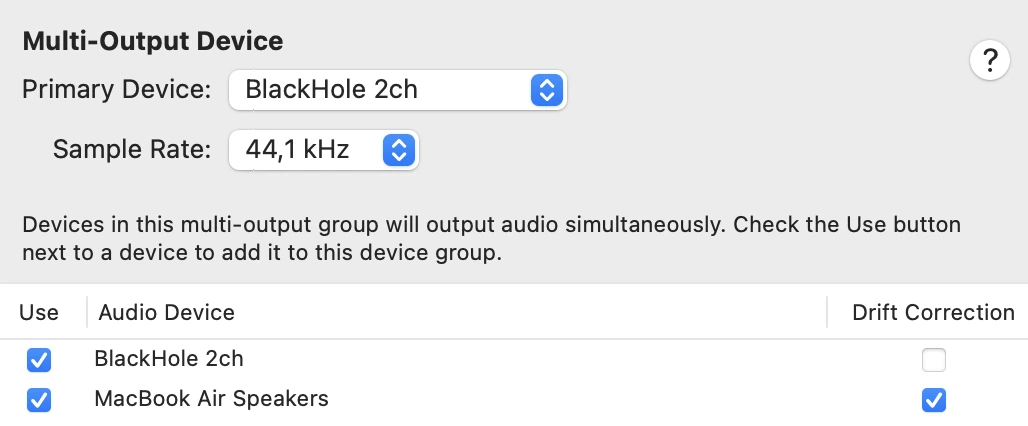
Create a new Multi-Output Device
Click the + button in the bottom left and select Create Multi-Output Device. -
Select your outputs
In the left-hand panel, check the boxes for:- BlackHole 2ch
- Your usual output (e.g. MacBook Speakers, External Headphones, or an audio interface)
You’ve now created a virtual output that mirrors audio to both BlackHole and your speakers, so you can hear what you're doing while routing it to another app.
Make sure to enable Drift Correction for your physical output (like your headphones or speakers) to keep everything in sync.
Set BlackHole as the Primary Device, and use a sample rate of 44.1 kHz to avoid compatibility issues with most apps and DAWs.
Now that your Multi-Output Device is set up, it’s time to route your DAW’s audio through it.
- Open GarageBand (or your preferred DAW)
- Go to Settings > Audio/MIDI
-
Set the Output Device
Choose the Multi-Output Device you just created
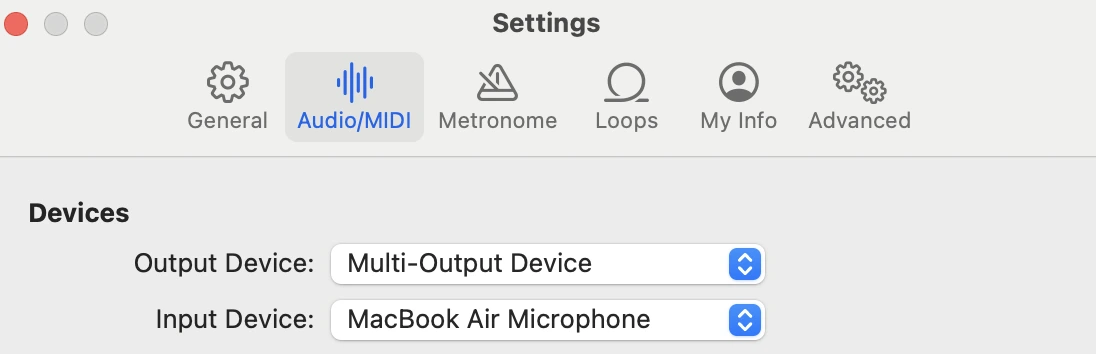
GarageBand will now send its audio through BlackHole and your headphones or speakers at the same time, so you can monitor your sound while routing it into another app.
This setup works the same way in most DAWs: just look for Audio/MIDI settings and select the Multi-Output Device as your output.
Once everything is set up, you can send your DAW’s audio directly into another app, like Zoom, OBS, Discord, or Sounts.
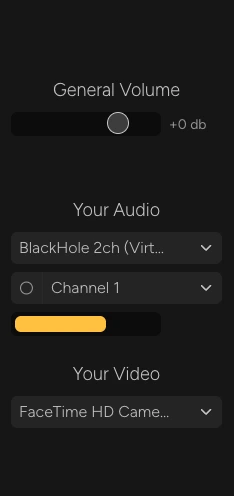
To make this work, simply select “BlackHole 2ch” as the input device in the app you want to route your audio into. The app will now receive your DAW audio just like it would from a microphone.
When you're creating a new sount or adding a contribution, choose “BlackHole 2ch” as your audio input in the Sounts recording interface. Your DAW’s output will be recorded directly, clean and high quality.
Important: In your Mac sound settings, make sure your regular output (like your headphones or speakers) is selected, not BlackHole.
Otherwise, you won’t hear system sounds, including playback from Sounts while you're recording.
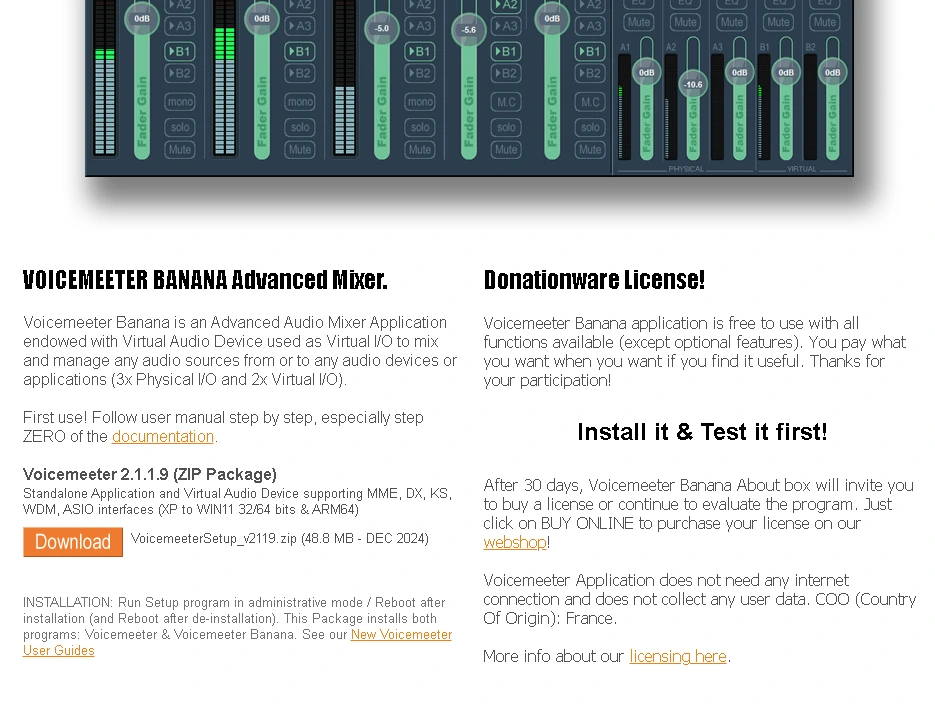
To route audio from your DAW into other apps on Windows, you’ll need VoiceMeeter Banana, a free virtual audio mixer that acts like BlackHole, but with even more control.
Head to vb-audio.com/Voicemeeter/banana.htm and download the installer.
VoiceMeeter Banana is licensed as Donationware:
- You can use it for free with all features unlocked
- After 30 days, a small message will appear prompting you to support the project
- You can continue using it for free, or buy a license anytime if you find it useful
(Donating is always a nice way to support great tools like this)
Once downloaded, run the VoiceMeeter setup and follow the install instructions. Important: You’ll need to restart your PC after installation for everything to work properly.
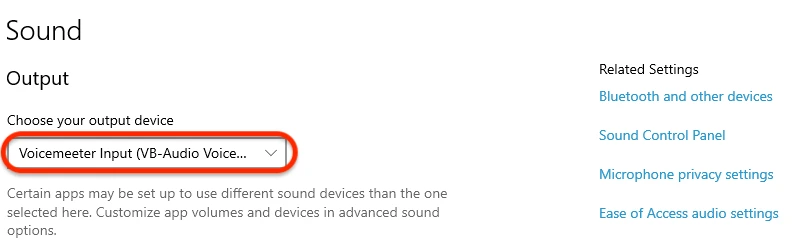
To route system audio into VoiceMeeter, you need to set it as your default output device in Windows:
- Go to Settings > System > Sound
- Under Output, select VoiceMeeter Input (VB-Audio VoiceMeeter VAIO)
This ensures that system sounds (like browser audio) go through VoiceMeeter so you can hear them, but still control whether they get recorded. Important: Don’t select VoiceMeeter AUX Input (VB-Audio VoiceMeeter AUX VAIO) as your output. This will send system sounds into the same channel you're using for your DAW, which can lead to unwanted recordings or audio overlap.
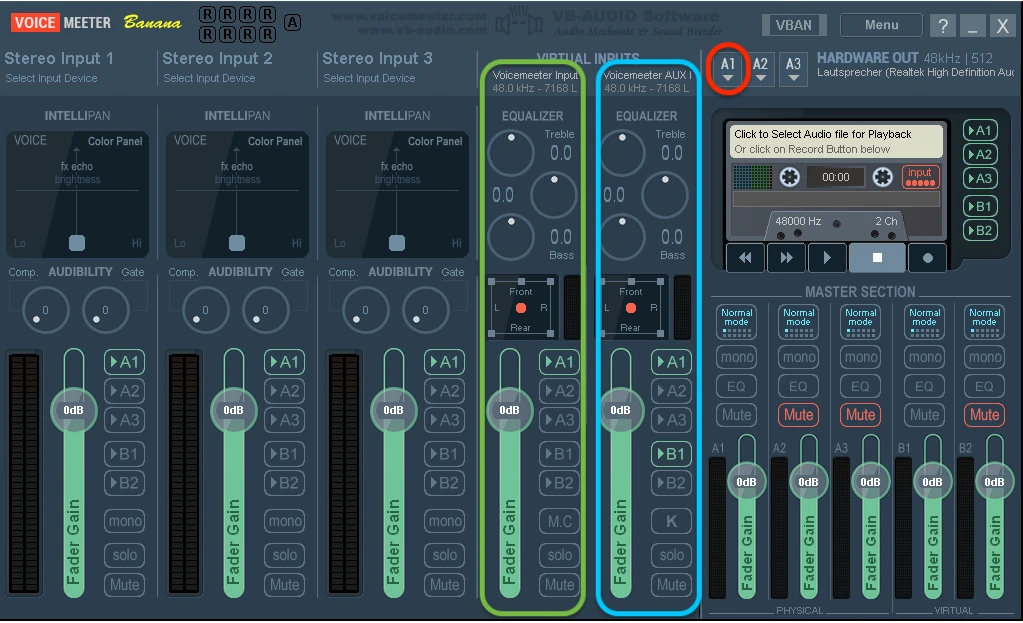
Now configure VoiceMeeter so that your DAW audio is routed to your target app, and system audio is not.
- A1 (top right) → Select your actual speaker or headphones (e.g. Realtek, USB audio interface). This is how you’ll hear everything.
-
On the
Voicemeeter AUX Input
strip (usually on the right):
- Turn on A1 to hear your DAW
- Turn on B1 to send your DAW audio to other apps
-
On the
Voicemeeter VAIO Input
strip (the one for system sounds):
- Turn on A1 to hear it
- Turn off B1 to avoid sending system sounds into your recording
B1 is the virtual output that other apps listen to. Only your DAW audio should be routed there.
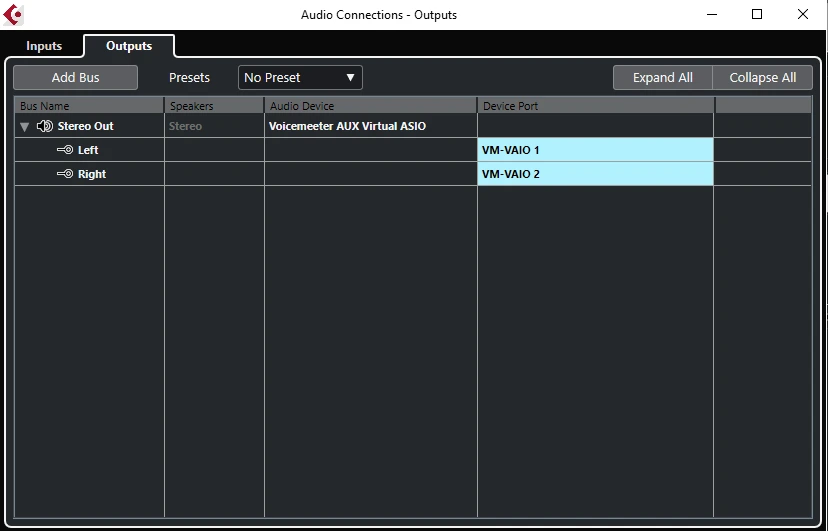
- Open Cubase and go to Studio > Setup > Audio System
- Select VoiceMeeter AUX Virtual ASIO as your audio driver
- Go to Studio > Audio connections and set your main output bus to "VoiceMeeter AUX Virtual ASIO"
This sends your Cubase mix into VoiceMeeter AUX, which you’ve already routed to both your speakers (A1) and your virtual output (B1), so you can monitor your audio while making it available to other apps.
This works the same way in most DAWs: just choose VoiceMeeter AUX as your output driver.
Once everything is set up, you can send your DAW’s audio directly into another app, like Zoom, OBS, Discord, or Sounts.
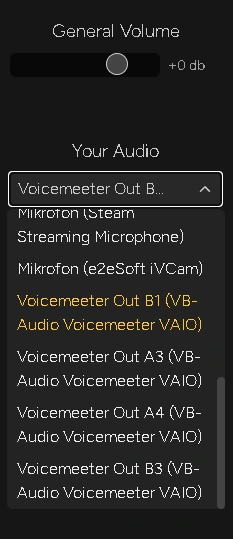
To make this work, simply select “Voicemeeter Out B1 (VB-Audio Voicemeeter VAIO)” as the input device in the app you want to route your audio into. The app will now receive your DAW audio just like it would from a microphone.
When you're creating a new sount or adding a contribution, choose “Voicemeeter Out B1 (VB-Audio Voicemeeter VAIO)” as your audio input in the Sounts recording interface. Your DAW’s output will be recorded directly, clean and high quality.
Troubleshooting Common Issues
If you don’t hear anything, check your Mac’s sound settings. Make sure your regular output (like your headphones or speakers) is selected.
If it’s set to BlackHole, your system sounds won’t play, and you won’t hear playback from apps like Sounts.
If the sound from your DAW feels laggy or cuts out, try adjusting the audio settings in your DAW. Look for something like “I/O buffer size” and set it to 128 or 256.
Lower numbers give you faster response but can cause glitches on slower systems. Higher numbers are more stable but might feel a little delayed.
Most people find that 128 or 256 works well without any problems.
If BlackHole doesn’t show up in your DAW, try restarting the app.
Also, check System Settings > Privacy & Security > Microphone and make sure your DAW is allowed to use the microphone. macOS sometimes treats audio inputs like microphones and blocks them by default.
If the app you’re using doesn’t pick up any sound, try switching the audio input to something else and then back to BlackHole 2ch.
This refresh often helps if the connection didn't register properly the first time.
If you don’t hear anything, check your Windows sound settings. Make sure VoiceMeeter Input (VB-Audio VoiceMeeter VAIO) is set as your output.
Also check that A1 is turned on in VoiceMeeter and set to your actual speakers or headphones.
This can happen if your system and VoiceMeeter don’t use the same settings.
- Try setting the sample rate in both VoiceMeeter and Windows to 44.1 kHz
- In VoiceMeeter, go to the top right and choose A1, then select your actual output (like Realtek or your USB device)
- If the sound still crackles, try increasing the buffer size in the A1 settings
If you're hearing system sounds or Sounts playback in your recording, check the VoiceMeeter VAIO strip (usually in the middle).
Make sure B1 is turned off there. This stops system sounds from being recorded.
If VoiceMeeter suddenly stops passing audio, click Menu > Restart Audio Engine at the top left.
If that doesn’t help, restart your computer or unplug and replug your audio device.
It's normal for VoiceMeeter to add several new devices.
Just remember:
- Use VoiceMeeter Input as your Windows output
- Use VoiceMeeter Out B1 as your input in the app you want to record into
How to Use MIDI for Sounts
While we don’t have any built-in MIDI instruments in the app yet, you can still use your favorite DAW to play MIDI and route the audio into Sounts using a simple workaround.
If you haven’t set up audio routing yet, jump to Setting Up Audio Routing first.
Here’s how to use MIDI with Sounts:
-
Load your MIDI instrument in your DAW.
Whether you’re using a synth plugin, drum machine, or any virtual instrument, just play it like you normally would. -
Route the audio output of your DAW using BlackHole
(macOS) or VoiceMeeter (Windows).
This captures the audio from your MIDI performance in real time. -
Select the routed audio as input in Sounts.
In the Sounts recording interface, choose “BlackHole 2ch” (macOS) or “VoiceMeeter Out B1” (Windows) as your input.
Your MIDI sound will now be recorded in Sounts just like any other instrument.
Wrap-Up
Routing audio from your DAW into another app might sound complicated at first, but with the right setup, it’s actually pretty simple.
Using a virtual audio driver like BlackHole or VoiceMeeter, you can send clean audio from your DAW into any app that accepts external input. This works great for streaming, recording, video calls, or collaborative music platforms like Sounts.
It gives you full control over your sound and lets you make the most of your instruments, plugins, and effects without needing extra hardware.
Ready to record? Jump into Sounts and show us your favorite MIDI instrument in action.
